
HedmanSoft Milestones – This plugin came about when I needed to show multiple milestones on my site and didn’t want to replicate the Jetpack Milestone widget for each milestone. Moreover, I wanted the milestone to automatically go away once the date had arrived and new milestones to automatically appear when they are within a certain number of days.
Milestones That Automatically Appear and Leave
Installation Details
- Upload the plugin files to the `/wp-content/plugins/hs_milestones` directory, or install the plugin through the WordPress plugins screen directly.
- Activate the plugin through the ‘Plugins’ screen in WordPress
- Use the Settings->HedmanSoft Milestones screen to access the Administration Screen of the plugin
Administration Panel
From the Administration page, you can begin defining those events that you want to appear as milestones. A milestone will be a simple box showing the title of the event and (optionally) a short description. You can also choose to attach a link to an event (such as a reference to a graphic file or a PDF document) that can be opened by the user when they click on it. To start, go to the Settings/HedmanSoft Milestones option from your WordPress Dashboard.
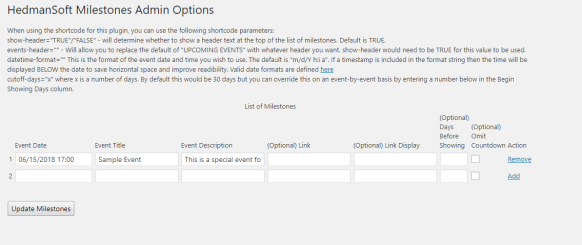
Each event in the Administration panel has a date/time, a short title, a short description, and optional link address (URL) with accompanying link description. You can optionally supply an override for when to begin showing this event as a milestone (the default is 30 days prior) and you can also choose to not show the countdown days/hours in the milestone.
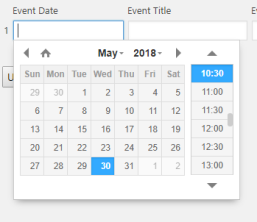
Event Date – The event date and time uses a jquery date/time picker found on xdsoft.net (Link to xdsoft.net here) which is packaged with the plugin. This date/time picker works quite well and is intended to prevent bad values to be entered for date and time (which would break the milestone generation code).
When finished adding a row, click the Add link at the end of the row. NOTE: If you are making changes elsewhere in the grid or to the timezone setting, you will LOSE those changes if you add a row. Use the Update Milestones button at the bottom of the panel to save changes to other rows or the timezone selection before adding new rows.

Notice that if you add an event that is in the past (or you come into the Administration Panel later and an event has passed) the event will display in orange, signifying that it will not be displayed since it has already expired.

In the above example, we have a valid event that has a short title and a description. We want this event to NOT start showing in our milestones until two days prior to the event (overriding the default 30 days).
Here is an example of several meetings scheduled in advance (with one already expired).

Short Codes
To use this plugin you will want to include a short code, either on one of your pages/posts, or in the widget area. The short code for the milestones is quite simple:
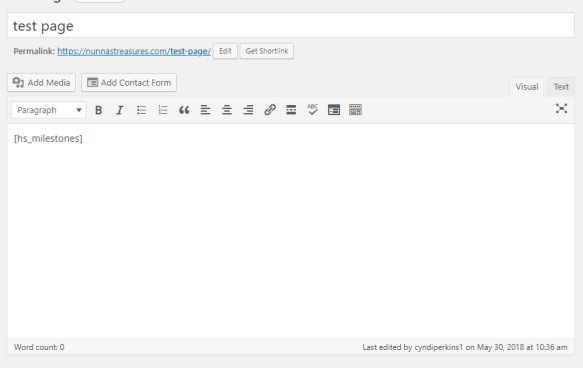
The above short code in a test page will look like the following:
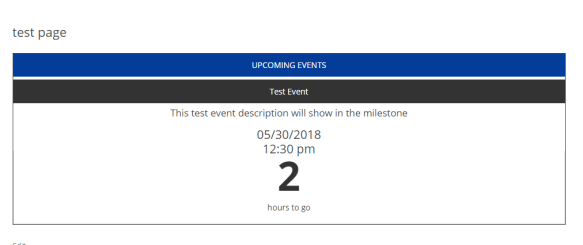
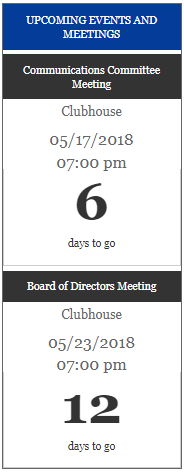
However, normally these milestones are best used in the widget area so that they are visible across your site. Since the short code is used to invoke the milestone display, use a plain text widget such as this:
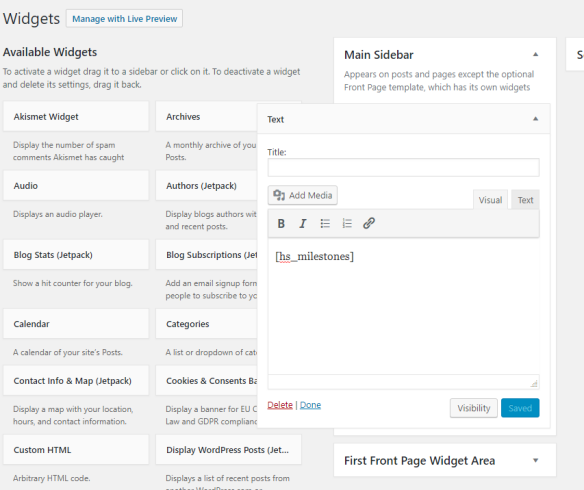
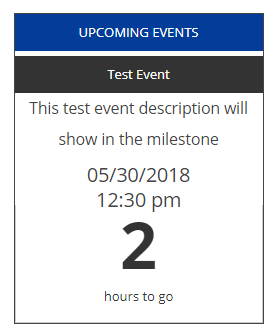
This will show the same information we saw on the test page – but in a smaller form:
Short Code Parameters
You can override the default rendering of the milestones with the following parameters:
- show-header=”TRUE”/”FALSE” – will determine whether to show a header text at the top of the list of milestones. Default is TRUE.
- events-header=”” – Will allow you to replace the default of “UPCOMING EVENTS” with whatever header you want. show-header would need to be TRUE for this value to be used.
- datetime-format=”” This is the format of the event date and time you wish to use. The default is “m/d/Y h:i a”. If a timestamp is included in the format string then the time will be displayed BELOW the date to save horizontal space and improve readability. Valid date formats are defined here
- cutoff-days=”x” where x is a number of days. By default this would be 30 days but you can override this if you want to show items that are more than 30 days in the future. Remember that the Administration Panel allows you to PREVENT showing events until x number of days where this parameter allows you to see future events.
